Self-Host Uptime Kuma on a VPS for Free Status Monitoring
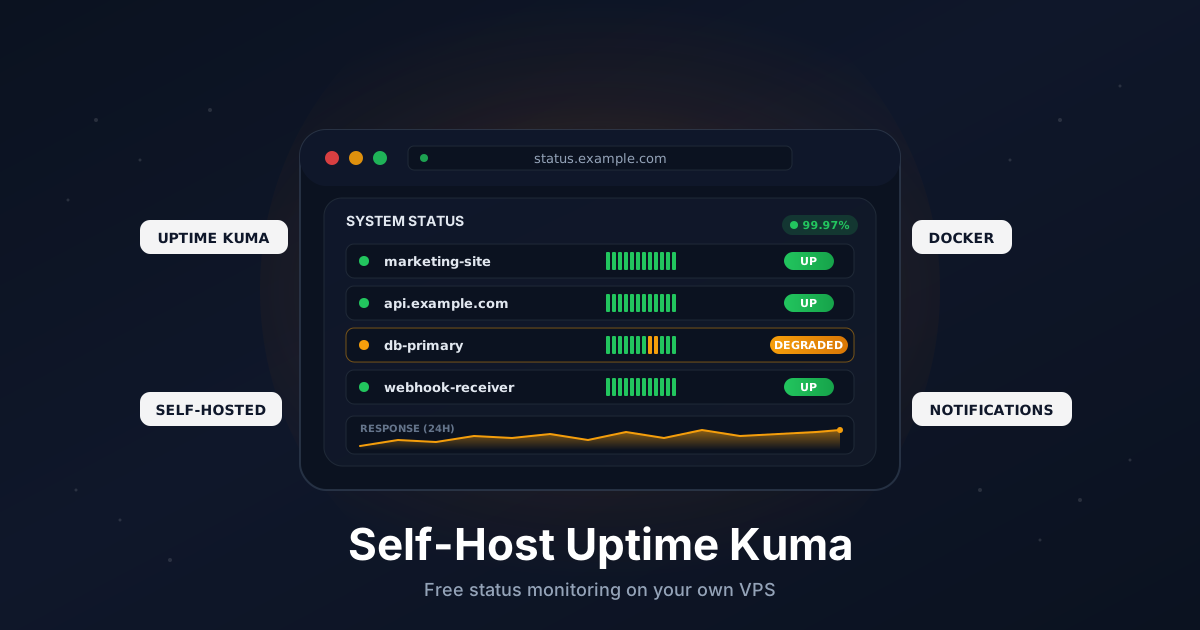
You only notice your hosting is down when a customer tells you. By then it's already a bad day. A small monitoring box that pings your sites every minute and shouts at you the second something breaks is the cheapest insurance you can buy, and you can run it yourself for free.
Uptime Kuma is an open-source, self-hosted monitoring tool in the spirit of Pingdom or UptimeRobot. It checks HTTP endpoints, ping, TCP ports, DNS records, certificates, Docker containers, and dozens of other things. It pushes alerts to Discord, Slack, email, Telegram, Gotify, ntfy, and 90+ more channels. And it produces a polished public status page out of the box.
This guide walks through a production-ready install on a single VPS: Docker, persistent volumes, Caddy reverse proxy with automatic HTTPS, monitors, notifications, a public status page, and backups.
TL;DR
- Install Docker and Docker Compose on a fresh VPS
- Point a subdomain like
status.example.comat your server - Run Uptime Kuma and Caddy with one
docker-compose.yml - Create the admin account on first visit, then add monitors
- Wire up Discord, Slack, or email notifications
- Publish a public status page on its own subdomain
- Back up the
/app/datadirectory daily
Total time: about 15 minutes.
What You Need
- A VPS with at least 512 MB RAM (1 GB recommended) running Ubuntu 22.04 or 24.04
- A domain you can add DNS records to
- Ports
80and443open to the internet (Let's Encrypt requires this) - Root or sudo access
Uptime Kuma is light. It idles around 80 MB of RAM and barely touches the CPU even with hundreds of monitors.
Step 1: Point a Subdomain at Your VPS
In your DNS provider, add an A record:
status.example.com → YOUR_VPS_IPV4
Add an AAAA record if you also use IPv6. If you plan to publish a separate public status page later, add a second hostname now:
status.example.com    →  YOUR_VPS_IPV4
uptime.example.com    →  YOUR_VPS_IPV4
Verify both resolve:
dig +short status.example.com
dig +short uptime.example.com
DNS has to resolve before Caddy can request a Let's Encrypt certificate.
Step 2: Install Docker and Docker Compose
On a fresh Ubuntu box:
sudo apt update
sudo apt install -y ca-certificates curl

sudo install -m 0755 -d /etc/apt/keyrings
sudo curl -fsSL https://download.docker.com/linux/ubuntu/gpg \
  -o /etc/apt/keyrings/docker.asc
sudo chmod a+r /etc/apt/keyrings/docker.asc

echo "deb [arch=$(dpkg --print-architecture) signed-by=/etc/apt/keyrings/docker.asc] \
  https://download.docker.com/linux/ubuntu $(. /etc/os-release && echo $VERSION_CODENAME) stable" | \
  sudo tee /etc/apt/sources.list.d/docker.list > /dev/null

sudo apt update
sudo apt install -y docker-ce docker-ce-cli containerd.io docker-buildx-plugin docker-compose-plugin
Verify:
docker --version
docker compose version
Step 3: Open the Firewall
If you use UFW:
sudo ufw allow 22/tcp
sudo ufw allow 80/tcp
sudo ufw allow 443/tcp
sudo ufw enable
Caddy needs 80 for the ACME HTTP challenge and 443 for HTTPS. Don't expose Uptime Kuma's container port 3001 directly.
Step 4: Create the Project Directory
sudo mkdir -p /opt/uptime-kuma
cd /opt/uptime-kuma
sudo mkdir -p data caddy-data caddy-config
Everything persistent lives under /opt/uptime-kuma. That's the one path you need to back up.
Step 5: Write the Compose File
Create /opt/uptime-kuma/docker-compose.yml:
services:
  uptime-kuma:
    image: louislam/uptime-kuma:1
    container_name: uptime-kuma
    restart: unless-stopped
    environment:
      UPTIME_KUMA_PORT: "3001"
    volumes:
      - ./data:/app/data
    networks:
      - kuma-net

  caddy:
    image: caddy:2
    container_name: kuma-caddy
    restart: unless-stopped
    ports:
      - "80:80"
      - "443:443"
    volumes:
      - ./Caddyfile:/etc/caddy/Caddyfile:ro
      - ./caddy-data:/data
      - ./caddy-config:/config
    networks:
      - kuma-net

networks:
  kuma-net:
A few notes:
- The
./databind mount is the entire database (SQLite by default), monitor history, and uploads. Lose it and you lose every monitor. - Container port
3001stays internal. Caddy reaches it over the Docker network. - Pin the image to the major tag (
1) so you don't get surprise major-version upgrades.
Step 6: Write the Caddyfile
Create /opt/uptime-kuma/Caddyfile:
status.example.com {
    encode zstd gzip

    reverse_proxy uptime-kuma:3001
}
That's the whole file for now. Caddy will request a Let's Encrypt certificate the first time it boots.
Step 7: Start the Stack
cd /opt/uptime-kuma
sudo docker compose up -d
sudo docker compose logs -f
Watch the Caddy logs until you see the certificate being issued. Then open https://status.example.com. You'll see Uptime Kuma's setup screen.
Pick a username and a strong password. There is no public registration flow - this first account is the only admin, and the form disappears after you submit it.
Step 8: Trust Caddy as a Reverse Proxy
By default Uptime Kuma logs the IP of whatever connects to it directly, which is now the Caddy container. To see real client IPs in the audit log and rate-limit logic, tell Uptime Kuma to trust Caddy as a reverse proxy.
In the Uptime Kuma UI:
- Click your username top-right
- Open
Settings, thenReverse Proxy - Add
172.16.0.0/12to the trusted proxies list (the default Docker bridge network range) - Save
If your Docker network uses a different subnet, swap in the matching CIDR. You can find it with docker network inspect uptime-kuma_kuma-net.
Step 9: Create Your First Monitors
Click Add New Monitor. Uptime Kuma supports dozens of monitor types. The four you'll use most:
HTTP(s) - the default. Hits a URL on a schedule and checks the status code. Good for websites, APIs, and webhook endpoints.
Friendly Name: Marketing site
Monitor Type:  HTTP(s)
URL:           https://www.example.com
Heartbeat:     60 seconds
Retries:       2
Ping - sends ICMP echo to a host. Good for routers, gateways, and bare IPs.
Friendly Name: Office gateway
Monitor Type:  Ping
Hostname:      192.0.2.1
Heartbeat:     60 seconds
TCP Port - opens a TCP connection. Good for SSH, databases, RDP, SMTP, and anything that doesn't speak HTTP.
Friendly Name: Postgres primary
Monitor Type:  TCP Port
Hostname:      db.example.com
Port:          5432
Heartbeat:     60 seconds
HTTP(s) - Keyword - same as HTTP, but also fails if a string is missing from the response body. Good for catching "200 OK with a broken homepage" failures.
Friendly Name: Login page contains "Sign in"
Monitor Type:  HTTP(s) - Keyword
URL:           https://app.example.com/login
Keyword:       Sign in
A few practical tips:
- Set
Heartbeatto 60 seconds for important services and 5 minutes for noisy ones. Uptime Kuma sends a notification on every state change, not on every check. - Use
Retriesof 2 or 3. Networks are flaky and a single failed probe rarely means real downtime. - Group related monitors with
Tagsso you can filter the dashboard later.
Step 10: Wire Up Notifications
Open Settings, then Notifications, then Setup Notification. Pick your channel.
Discord - the easiest. Create a webhook in your server (Server Settings, Integrations, Webhooks, New Webhook), copy the URL, paste it into Uptime Kuma. Done.
Slack - same flow with a Slack incoming webhook. The webhook URL is enough.
Email (SMTP) - works with Gmail (use an app password), Postmark, Mailgun, AWS SES, or any SMTP server. You need:
Hostname:   smtp.postmarkapp.com
Port:       587
Username:   <api-token>
Password:   <api-token>
From:       [email protected]
To:         [email protected]
Click Test before saving. If the test message arrives, you're good.
After creating a notification, edit each monitor and check the box for the channel(s) you want it to use. New monitors offer a Default enabled toggle so you don't have to wire it up twice.
Step 11: Publish a Public Status Page
A status page is the URL you share with customers when something breaks. They look at it instead of emailing you.
In Uptime Kuma, go to Status Pages, then New Status Page. Give it a slug like public, set a title, then drag the monitors you want visible into the page. Mark the page as Publish.
The page is now reachable at https://status.example.com/status/public. To put it on its own clean hostname, extend the Caddyfile:
status.example.com {
    encode zstd gzip
    reverse_proxy uptime-kuma:3001
}

uptime.example.com {
    encode zstd gzip
    redir / /status/public 302
    reverse_proxy uptime-kuma:3001
}
Reload Caddy:
sudo docker compose restart caddy
Visitors hitting https://uptime.example.com now land on your public status page. The admin login stays on status.example.com, which makes it easy to firewall or rate-limit separately.
Step 12: Protect the Admin Login
The status page is meant to be public. The admin login isn't. A few quick wins:
Restrict the login to specific IPs. If you have a static office IP or a VPN, gate the admin URL with Caddy:
status.example.com {
    encode zstd gzip

    @adminBlocked {
        path /dashboard*
        not remote_ip 203.0.113.10 198.51.100.0/24
    }
    respond @adminBlocked 403

    reverse_proxy uptime-kuma:3001
}
Enable 2FA. Open Settings, then 2FA. Scan the QR with any TOTP app (1Password, Bitwarden, Authy). Once enabled, password-only login is impossible.
Disable user creation. There's no signup, but rotate the admin password if you ever shared the URL on screen during a demo.
Put the admin behind a VPN. If you run Tailscale or WireGuard, the cleanest setup is a second hostname like kuma.tailnet.ts.net that only your tailnet can resolve. Leave the public status page on the open internet.
Step 13: Back Up the Data Volume
Everything Uptime Kuma knows lives in /opt/uptime-kuma/data. The SQLite database (kuma.db) is small but important. A daily snapshot is plenty.
Create /usr/local/bin/uptime-kuma-backup.sh:
#!/usr/bin/env bash
set -euo pipefail

BACKUP_DIR="/var/backups/uptime-kuma"
DATE="$(date +%F)"
mkdir -p "$BACKUP_DIR"

docker exec uptime-kuma sqlite3 /app/data/kuma.db ".backup '/app/data/kuma.db.bak'"

tar -czf "$BACKUP_DIR/uptime-kuma-$DATE.tar.gz" -C /opt/uptime-kuma data

find "$BACKUP_DIR" -name "uptime-kuma-*.tar.gz" -mtime +14 -delete
Make it executable and schedule it daily:
sudo chmod +x /usr/local/bin/uptime-kuma-backup.sh
echo "20 3 * * * root /usr/local/bin/uptime-kuma-backup.sh" | \
  sudo tee /etc/cron.d/uptime-kuma-backup
For off-site safety, push the backup directory to S3, Backblaze B2, or another VPS with rclone on the same schedule.
Step 14: Upgrade Safely
Uptime Kuma's 1.x line is stable and the upgrade path is boring on purpose:
cd /opt/uptime-kuma
sudo docker compose pull
sudo docker compose up -d
Take a fresh backup before any upgrade. If a release behaves badly, restore the data/ tarball and roll back to a specific tag:
sudo docker compose down
# edit the image tag in docker-compose.yml, e.g. louislam/uptime-kuma:1.23.13
sudo docker compose up -d
The 2.x release line is in beta at the time of writing. Don't run it on top of a 1.x database without reading the migration notes.
Troubleshooting
Caddy can't issue a certificate. DNS hasn't propagated yet, or 80/443 are blocked upstream by your provider firewall.
Login works but monitors never refresh. WebSocket isn't reaching Uptime Kuma. Almost always a hostname mismatch between the browser URL and the Caddyfile site block.
Real client IPs show up as 172.x.x.x. Add the Docker bridge subnet to Settings -> Reverse Proxy so Uptime Kuma trusts Caddy's X-Forwarded-For header.
Certificate monitor reports unknown. Some providers terminate TLS in front of your origin and present a different chain. Point the certificate monitor at the actual origin hostname, not a CDN edge.
Email notifications never arrive. Send a test. If it fails, your VPS provider blocks outbound port 25 or 587. Use Postmark, SES, or Mailgun on a non-25 port instead.
Going Further
- Switch to PostgreSQL or MariaDB. SQLite is fine up to a few hundred monitors. Past that, the official Docker image supports an external database via
DB_TYPEand friends. - Add a push-style monitor for cron jobs. Uptime Kuma's
Pushmonitors are a free dead-man's-switch for backups and scheduled tasks. - Pair with n8n to chain alerts into PagerDuty, ticketing, or auto-remediation flows.
- Stand up a second Uptime Kuma in another region to monitor the first one. A monitor that silently dies isn't a monitor.
That's the whole stack. A small VPS, a Caddyfile, and twenty minutes get you a free Pingdom replacement that you fully control - and a status page customers can trust.
Need a VPS for monitoring stacks like this? Our Linux plans include fast NVMe storage, IPv6, and snapshots out of the box. See the options.